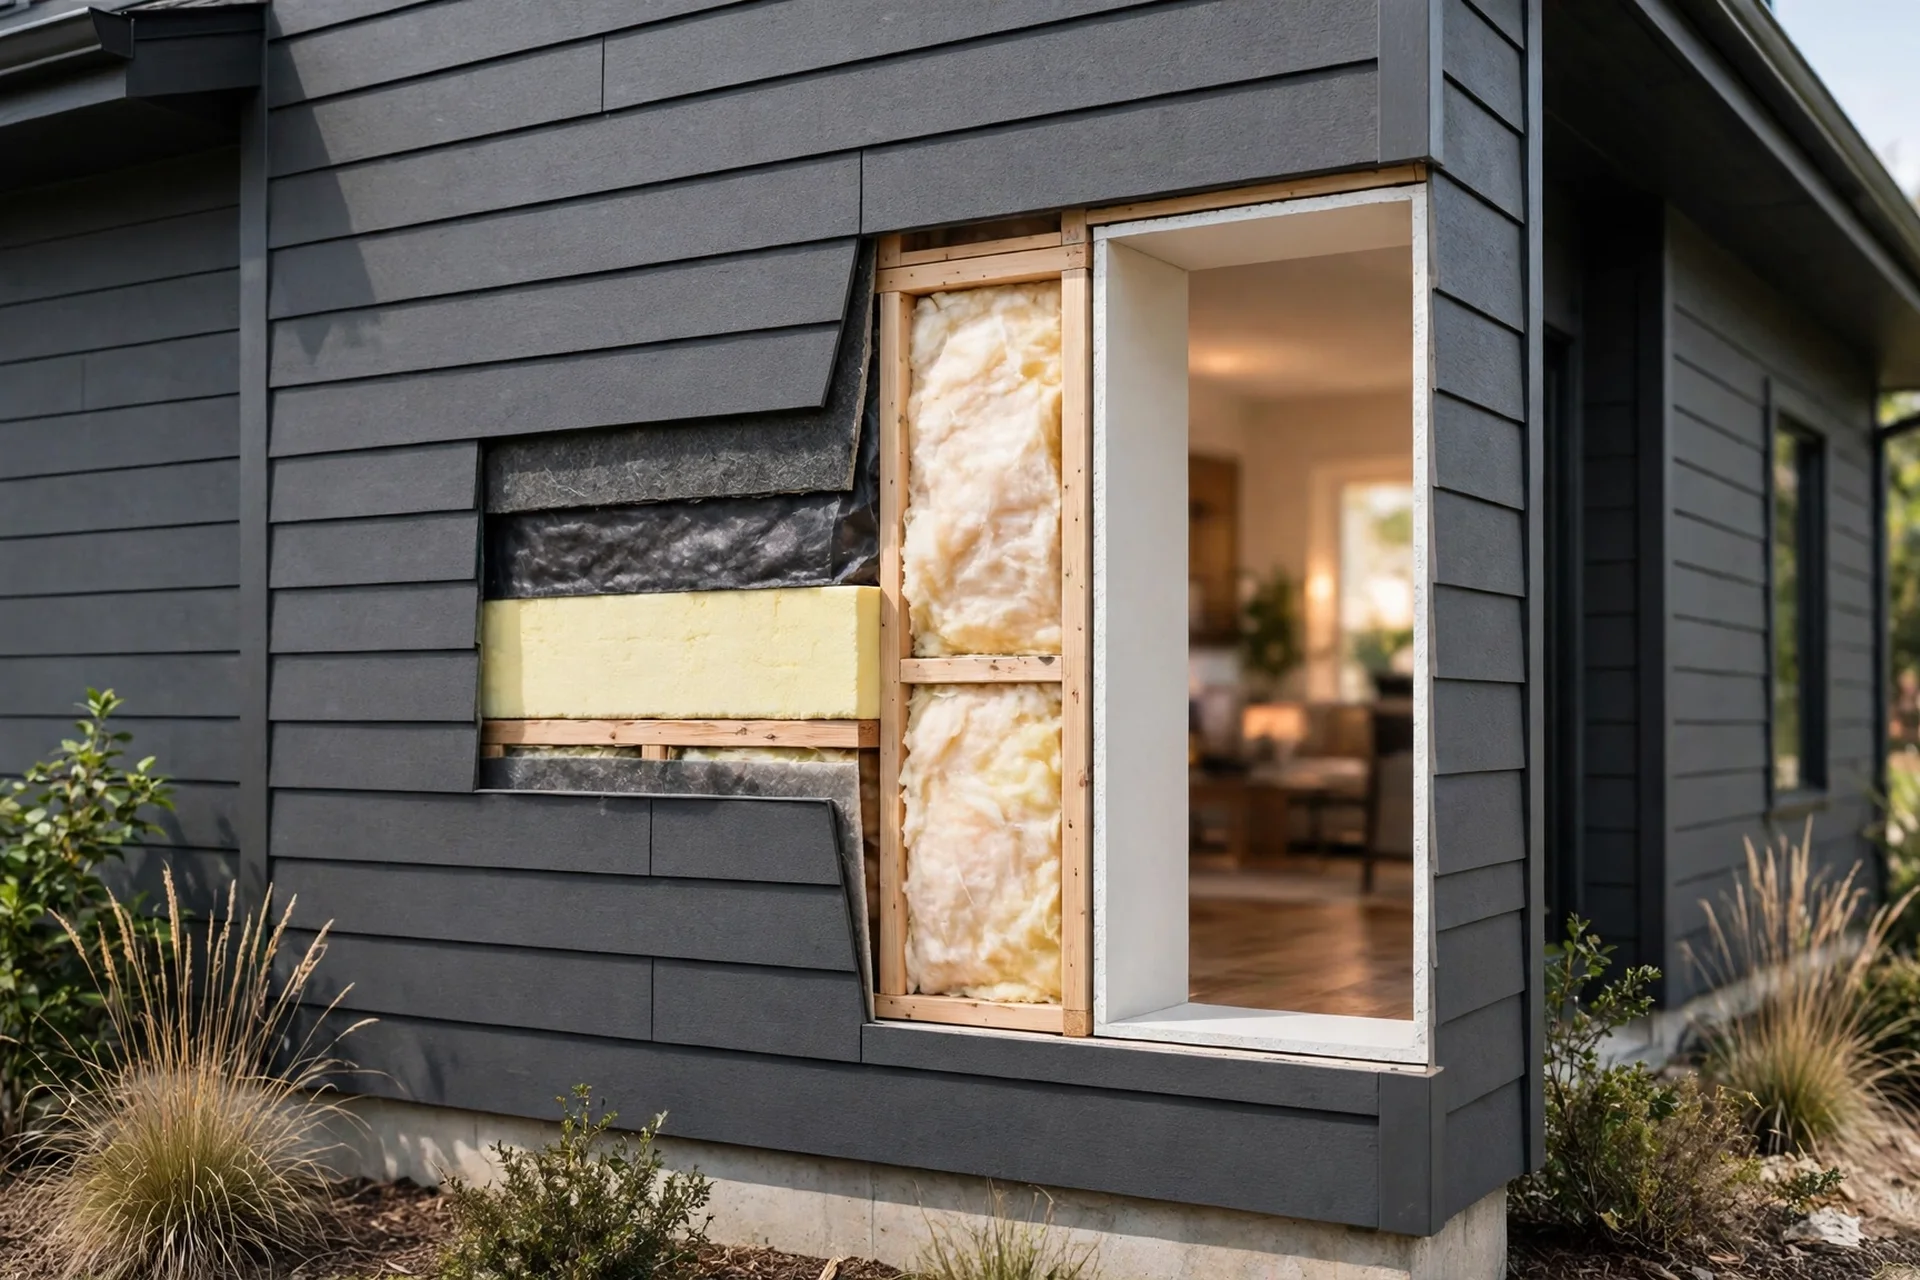
Exterior walls are one of the largest paths for heat to enter or leave a home, yet most homeowners assume the only fix is to tear the walls open and start again. That is not true. In many houses, a large share of winter heat loss and summer heat gain passes straight through wall assemblies that were built with little or no insulation, and much of that loss can be cut without removing drywall, siding, or the wall structure itself. Retrofit methods now allow insulation, air sealing, and reflective treatments to be added from the inside or the outside with only small access holes and surface work.
The direct answer is that you can reduce heat transfer through existing exterior walls by filling the empty wall cavities with blown-in cellulose, fiberglass, or injection foam, adding rigid foam boards to the outside face, fitting thin insulating panels on the inside, and sealing the air leaks around outlets, windows, and framing joints. Used together, these steps slow conduction through the wall, block the air movement that carries heat with it, and keep the wall dry so the insulation keeps performing. This guide explains how heat moves through walls, how to find your worst losses, and which retrofit option fits your wall type, climate, and budget.
How Heat Moves Through Your Exterior Walls
Heat travels through a wall in three ways, and each one needs a different fix. Conduction is heat moving directly through solid materials such as studs, sheathing, and brick. A bare timber stud transfers heat far faster than the insulation beside it, which is why walls with empty cavities feel cold in patches and develop cold spots near framing. Convection is heat carried by moving air, and it is often the bigger problem in older homes: warm indoor air escapes through gaps around wiring, plumbing, and framing, while cold outdoor air is drawn in to replace it. Radiation is heat travelling as infrared energy from a hot surface, which matters most on sun-baked walls in warm climates.
Where Do Exterior Walls Lose the Most Heat?
Start with a simple walk-through on a cold morning or a hot afternoon. Hold a damp hand near the edges of exterior walls, around electrical outlets, light switches, and window frames, and note where the air feels noticeably cooler or warmer than the room. Look for dark dust marks along skirting boards and around outlets, which often mark air leaking through gaps, and check for peeling paint or damp patches that suggest moisture is moving through the wall. These free checks will point you toward the worst walls before you spend anything on equipment.
Ask your energy supplier about a home energy audit, which usually includes a blower-door test that measures how much air your house leaks and where the largest leaks are.
Note which rooms feel hardest to heat or cool, because the walls facing the prevailing wind or the afternoon sun usually lose or gain the most heat.
Blown-In Cavity Insulation for Existing Exterior Walls
Blown-in insulation is the least disruptive way to fill an empty wall cavity. A contractor drills small holes, usually about 25 to 50 millimetres wide, through the interior drywall or the exterior siding at the top of each stud bay, then blows loose material into the cavity with a machine until it is densely packed. The holes are then plugged, patched, and painted, leaving almost no trace. Because the wall structure stays in place, most homes can be treated room by room in a day or two, and the house remains habitable throughout the work.
Rigid Foam Boards on the Outside of Existing Walls
When the cavity cannot be filled, or when you want a continuous layer that also covers the studs, rigid foam boards fixed to the outside face of the wall are the strongest retrofit available. Boards made from polyisocyanurate, extruded polystyrene, or expanded polystyrene are fixed over the existing sheathing or cladding, taped at the joints, and then finished with new siding, render, or cladding. Because the layer is continuous, it breaks the thermal bridge through the studs and can raise the whole wall’s performance far more than cavity fill alone.
Interior Insulating Panels That Keep Your Wall Structure Intact
Interior insulating panels are the practical choice when the outside of the house cannot be changed, for example on a listed facade, a boundary wall, or a home where new siding is not planned. Thin rigid boards, insulated plasterboard, or aerogel-based panels are fixed to the inside face of the exterior wall and finished with plaster or new drywall. The panels are far thinner than a new stud wall, so you lose only a few centimetres of room space, and the work can be done one room at a time without touching the structure.
Air Sealing the Hidden Gaps That Carry Heat Out of Your Walls
Air sealing is the cheapest heat-loss fix in most older homes, and it is often skipped because the leaks are invisible. Warm air escapes through the gaps where the wall meets the floor and ceiling, around window and door frames, where pipes and cables pass through the wall, and behind electrical boxes on exterior walls. Each gap is small, but together they can add up to the equivalent of leaving a window open all winter. Sealing them costs little and makes every other insulation measure work better.
Work from the inside where access is easy. Fit foam gaskets behind outlet and switch plates on exterior walls, caulk the joint between skirting boards and the wall, and seal around window architraves with a flexible sealant that moves with the timber. In the attic, seal the top of wall cavities where they meet the roof space, because warm air rises and escapes there first. Use low-expansion foam for larger gaps around pipes and vents, and take care not to seal a vent that a gas appliance or a bathroom fan depends on for safe operation.
Radiant Barriers and Reflective Coatings for Sun-Heated Walls
In warm and sunny climates, much of the heat entering through exterior walls arrives as radiant energy from the sun, and a reflective layer can cut that load in a way that bulk insulation cannot. A radiant barrier is a reflective foil layer fitted on the sun-facing side of the wall assembly or in the roof space, and it reflects infrared heat back outwards instead of letting the wall absorb it. Reflective exterior coatings and light-coloured finishes work on the same principle at the surface, keeping the wall itself cooler through the hottest part of the day.
Radiant barriers work best when there is an air gap beside the reflective face, because the foil needs space to reflect heat rather than conducting it into the next layer. They are most effective on west- and south-facing walls that take direct afternoon sun, and they are a useful addition rather than a replacement for insulation. In cooler climates their benefit is smaller, and money is usually better spent on cavity insulation and air sealing first. A light-coloured, heat-reflective paint can still help on any sun-exposed wall, provided the wall is clean, dry, and properly primed before coating.
Keeping Exterior Walls Dry So Insulation Keeps Working
Wet insulation is poor insulation. Even a small amount of moisture in a wall can cut the thermal performance of fibrous insulation by a large margin, and persistent damp can lead to mould, rot, and plaster failure. Before adding any retrofit insulation, walk around the outside of the house and fix the water problems first: clear blocked gutters and downpipes, repair cracked render and missing pointing, check that the ground slopes away from the wall, and make sure soil or paving is not piled above the damp-proof course.
After a retrofit, watch the wall for the first winter. Look for new damp patches, condensation on windows, or a musty smell in the treated rooms, and check that vents and trickle vents are still open. Small problems caught early are usually a matter of adjusting ventilation or resealing a joint, while problems left for a year can mean stripping the new work out. A quick seasonal check costs nothing and protects the investment you have just made in the walls.
Exterior Wall Heat Loss Fixes That Backfire Without a Pro
Some wall problems should not be treated as DIY, even when the product looks simple. Walls that show structural cracking, bowing, or settlement need a structural assessment before any insulation is added, because covering the symptoms can hide a problem that is getting worse. Homes with asbestos-containing siding or insulation, lead paint, or old electrical wiring need specialist handling, and disturbing those materials without proper controls can create a serious health risk. If your house is listed or in a conservation area, exterior changes may also need permission before work starts.
When you do hire a contractor, ask for specifics rather than promises. A good installer will explain which material they are using and why, how they will check for voids and moisture, what R-value the finished wall should achieve, and how the access holes will be finished. Ask for references from similar homes and a written warranty, and be wary of anyone who guarantees a fixed percentage of energy savings, since real savings depend on the whole house, not just the walls. The cheapest quote is rarely the best value when the work is hidden inside a wall you cannot inspect.
Final Thoughts: Cutting Heat Transfer Through Your Existing Exterior Walls
You do not need to replace your walls to make them perform far better. In most homes the best sequence is simple: find the worst heat losses first, seal the air leaks, fill the empty cavities with a suitable blown-in material, and then add an exterior or interior layer only where the wall type or the climate justifies it. Keep the wall dry at every stage, and treat moisture and structural problems before you insulate rather than after. Done in that order, a retrofit can make rooms warmer in winter, cooler in summer, and cheaper to run, while the wall structure itself stays exactly where it is. Start with one wall, measure the difference, and then decide how far to take the rest of the house.
Exterior Wall Heat Transfer FAQs
Can I insulate exterior walls without removing drywall?
Yes, in most timber-frame homes. Blown-in cellulose, fiberglass, or injection foam can be installed through small holes drilled in the drywall or siding, so the wall structure stays intact. The holes are patched and painted afterwards, and the work is usually finished in a day or two.
Which retrofit insulation works best for existing walls?
There is no single best choice. Dense-pack cellulose suits most empty cavities and fills irregular spaces well, injection foam adds air sealing where walls leak heavily, and rigid foam boards outside give the highest performance on solid walls. The right option depends on wall depth, moisture exposure, and budget.
Will adding insulation to my walls cause damp or mould?
It can if moisture is trapped or ventilation is blocked. The risk is highest when insulation is added to a wall that is already wet, or when interior panels are fitted without a vapour control layer. Fix water entry first, keep the wall able to dry, and maintain ventilation in kitchens and bathrooms.
How much heat is lost through uninsulated exterior walls?
The share varies with the house, but in uninsulated homes walls commonly account for around a third of total heat loss, with the rest escaping through the roof, windows, floors, and air leaks. An energy audit or thermal camera survey gives a more accurate figure for your own home.
Is exterior wall insulation worth it on a solid brick wall?
Yes, when the wall is dry and the finish is due for renewal. Exterior rigid boards or interior insulating panels can transform a cold solid wall, but the work needs careful detailing around windows, doors, and damp-proof courses, and a breathable system is usually safer on older masonry.
Do I need planning permission to insulate my exterior walls?
Internal work and cavity fill usually need no permission, but changing the outside appearance with new cladding or render can need approval, especially on listed buildings or in conservation areas. Check with your local planning authority before starting exterior work.

