A home with more than one water treatment device, a sediment filter, a carbon filter, a softener, an ultraviolet unit, and perhaps a reverse osmosis system under the sink, usually has its maintenance scattered across the house: cartridges in a cupboard, a manual in a drawer, and a vague memory of when anything was last changed. A dedicated filter maintenance station fixes that by bringing the whole treatment chain into one organised place, with labelled housings, stored spares, a visible schedule, and the tools to change a cartridge without flooding the room. The result is cleaner water, longer equipment life, and maintenance that actually happens on time.
This guide explains how to plan the station around your treatment chain, lay it out for safe and dry cartridge changes, build a maintenance calendar that covers every device, and monitor the system between changes so problems are caught while they are still small. The focus is on practical, homeowner-scale setups for municipal and well water, and the principles work whether the station is a full utility-room wall or a single well-planned cupboard.
Which Filters Belong in a Household Maintenance Station
A maintenance station should serve the whole treatment chain, not just one device, because the filters protect each other and the schedule only makes sense when it covers all of them. The chain usually runs in a fixed order: sediment pre-filtration first to catch sand and rust, then the specific treatment for the water’s problems, then carbon polishing for taste and odour, and finally disinfection or reverse osmosis for drinking water. Each stage has its own cartridge, its own lifespan, and its own failure mode.
Start by listing every device in the house and the water problem each one solves. A sediment filter protects everything downstream, a carbon filter removes chlorine and organic compounds, a softener handles hardness, an iron filter handles iron and manganese, an ultraviolet lamp handles bacteria, and a reverse osmosis membrane handles dissolved solids. Writing that list on the station wall turns a confusing collection of canisters into a system with a clear order and a clear purpose.
- Sediment filters catch sand, silt, and rust first, protecting finer filters downstream.
- Carbon filters remove chlorine, taste, odour, and many organic compounds.
- Softeners exchange calcium and magnesium for sodium or potassium to stop scale.
- Iron and manganese filters oxidise and capture metals that stain fixtures and laundry.
- UV disinfection kills bacteria and viruses without adding chemicals to the water.
- Reverse osmosis removes dissolved solids, nitrates, and heavy metals for drinking water.
This inventory also reveals gaps. A home with a UV lamp but no sediment filter will find the lamp struggling, since cloudy water shields microbes from the light, and a home with a softener but no carbon filter will still taste chlorine. The station makes those gaps visible, which is the first step to closing them.
How to Lay Out a Filter Station for Zones, Clearance, and Containment
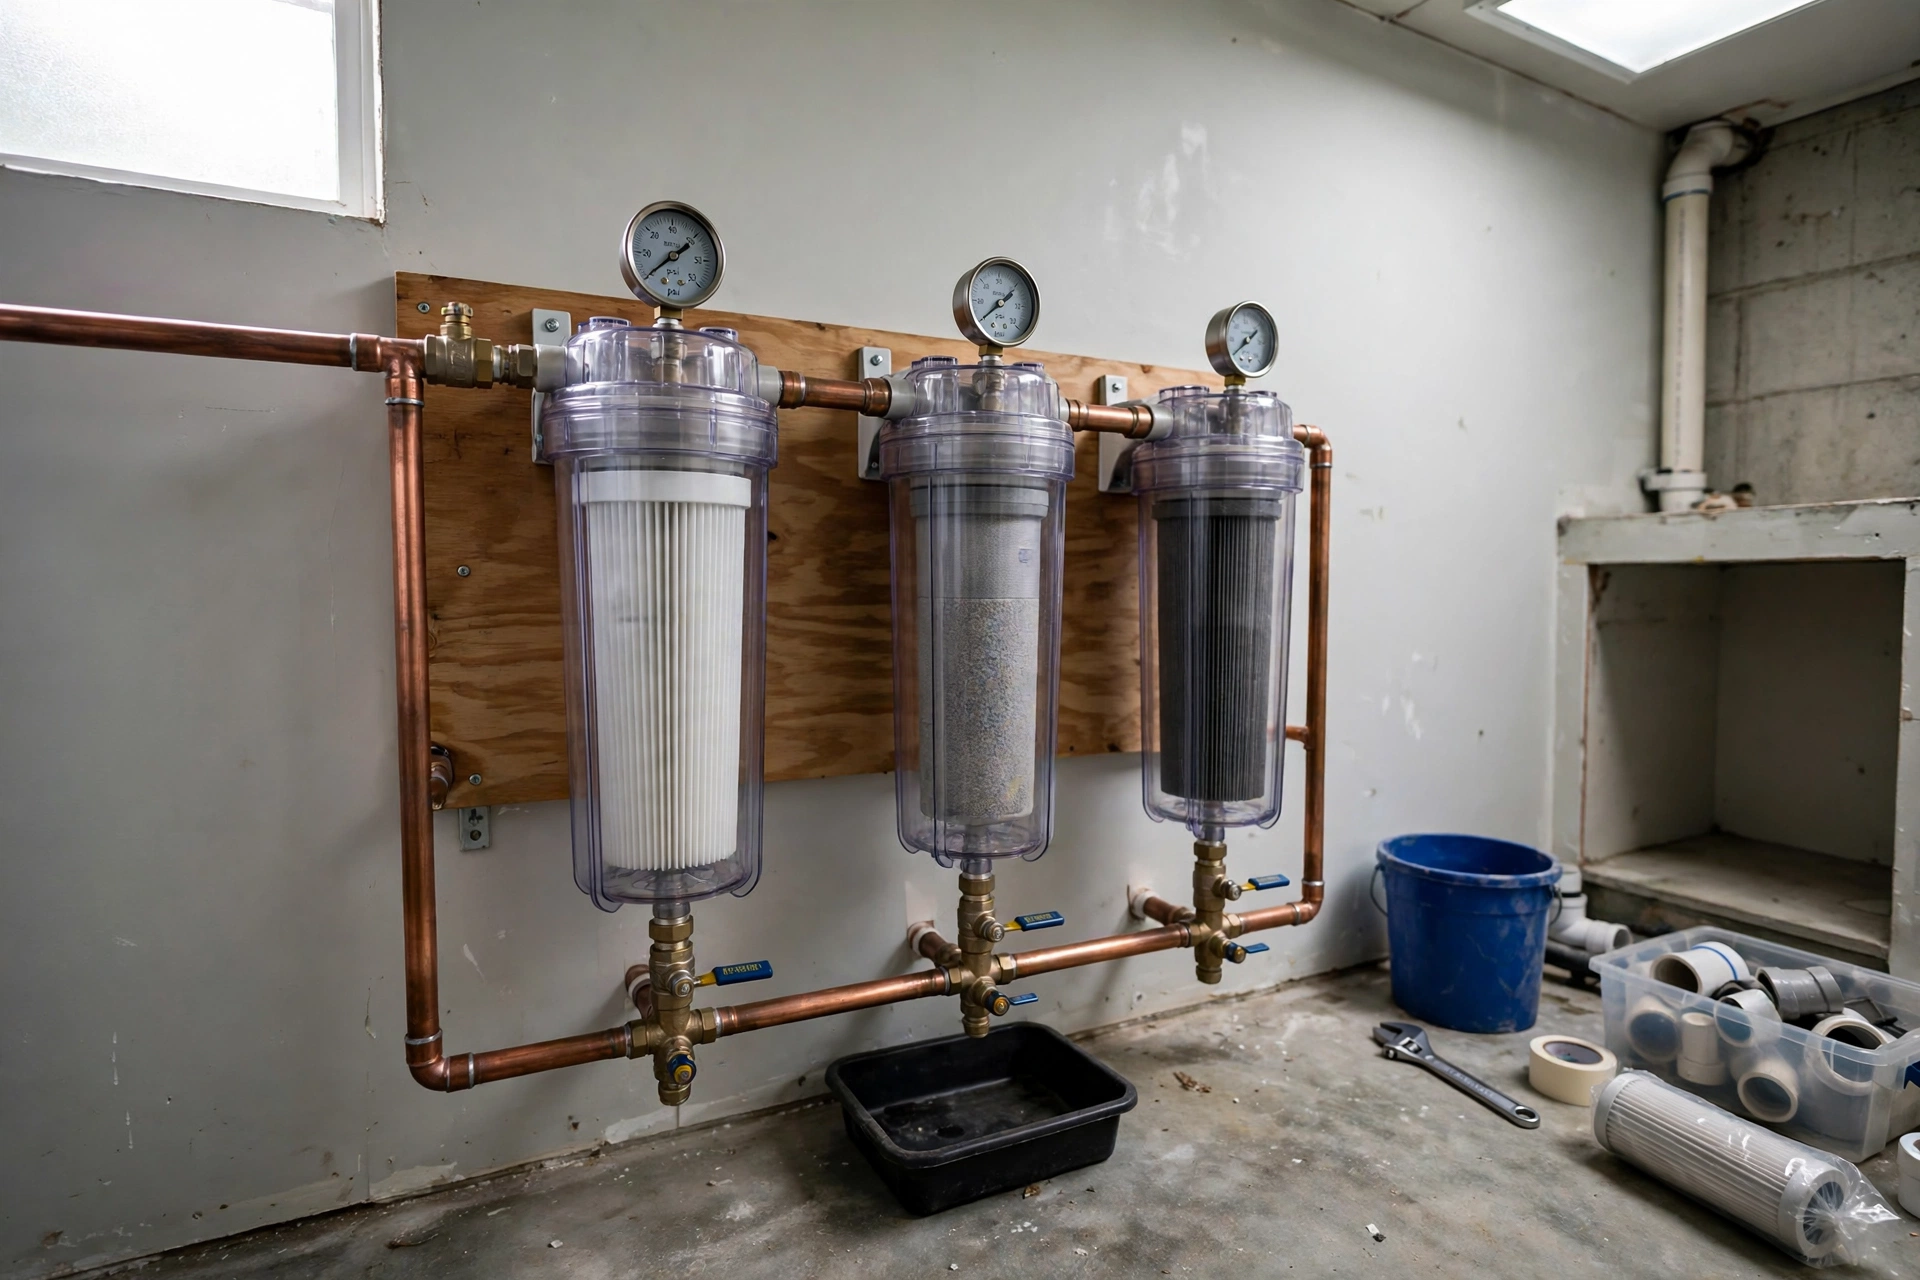
A good station is organised into zones so a cartridge change never becomes a search. The wet zone holds the housings themselves, mounted on a backboard with shutoff valves before and after each stage, pressure gauges on either side, and a floor drain or a large drip tray underneath. The dry zone holds labelled spares, O-rings, food-grade lubricant, and the filter wrench, all within arm’s reach but clear of splashes. The record zone holds the schedule, the last-change dates, and the water test results.
Clearance matters more than most people expect. Leave at least a hand’s width below each housing so the sump can drop clear, and leave enough room in front to swing the wrench without hitting the next housing. Mount housings at a height where a full sump can be lowered without bending double, and fit a bypass valve for the whole station so water can be restored to the house while one stage is being serviced.
- Mount housings on a plywood or plastic backboard with valves before and after each stage.
- Fit pressure gauges on both sides of each filter to show when it is clogging.
- Leave clearance below every housing for the sump to drop clear during changes.
- Add a drip tray or floor drain under the wet zone to catch the water every change releases.
- Keep spares dry on a shelf above splash height, labelled with the housing they fit.
Containment is the detail that separates a station from a corner of the basement. A shallow tray under the housings, a floor drain, or even a large plastic tub catches the water that escapes when a sump is unscrewed, and a towel rail and a bucket within reach make cleanup part of the routine rather than an emergency. A station that floods the floor every time a filter is changed will be avoided, and avoided maintenance is the most expensive kind.
The Maintenance Calendar for Every Filter in the Chain
Each filter type has its own service interval, and the calendar is what turns those intervals into habits. Sediment and carbon cartridges need replacement every few months, ultraviolet lamps need annual replacement even though they still glow, and reverse osmosis membranes last years but need their pre-filters changed on schedule to survive that long. Writing the dates on the station wall, or in a phone calendar with reminders, is what makes the system reliable.
| Component | Service task | Frequency | Typical annual cost |
|---|---|---|---|
| Sediment filter | Replace cartridge | Every 3 to 6 months | 40 to 100 dollars |
| Carbon filter | Replace cartridge | Every 6 to 12 months | 50 to 120 dollars |
| Water softener | Add salt, check resin | Monthly salt check | 80 to 200 dollars |
| UV system | Replace lamp, clean sleeve | Annually | 60 to 120 dollars |
| Iron filter | Backwash, check media | Weekly auto, media 3 to 5 years | 150 to 400 dollars per media change |
| pH neutralizer | Add calcite media | Every 12 to 24 months | 50 to 100 dollars |
| Reverse osmosis | Replace filters, membrane 2 to 3 years | Filters yearly | 80 to 150 dollars |
Costs are broad estimates only and vary with water quality, household size, and local prices, but a typical home spends a few hundred dollars a year on consumables across the whole chain. That spending is easy to justify when it is compared with the cost of a failed membrane, a scaled water heater, or a stained bathroom suite, all of which cost far more than the cartridges that would have prevented them.
Changing a Cartridge Without Flooding the Room
A cartridge change is simple when it is done in order, and messy when it is rushed. The sequence is always the same: isolate the housing, release the pressure, unscrew the sump, swap the cartridge, clean and inspect, reassemble, and restore water slowly while checking for leaks. Skipping the pressure release is the classic mistake, because a pressurised sump sprays water across the room the moment it breaks free.
Close the inlet and outlet valves for the housing being serviced.
Open the pressure relief button or a nearby tap to release trapped pressure.
Place a bucket under the housing and unscrew the sump with the filter wrench.
Remove the old cartridge, tip out the water, and clean the sump with mild soap and warm water.
Inspect the O-ring, replace it if it is flattened or nicked, and lubricate it lightly.
Fit the new cartridge the right way up and screw the sump back hand-tight plus a small turn.
Open the inlet valve slowly, check for leaks, then open the outlet and flush for a few minutes.
Flushing after a change matters, because new carbon cartridges release fine black dust and new sediment cartridges shed loose fibres, both of which clear within a few minutes of running water. Run a tap downstream until the water runs clear before using it for drinking or cooking, and note the change date on the station record before moving on.
Sanitising Housings, Tanks, and Lines Between Changes
Filters remove contaminants, but housings and tanks can grow biofilm if they are never cleaned, so sanitising belongs in the station routine. Clean each housing with mild soap and warm water during every cartridge change, and sanitise storage tanks quarterly with a mild bleach solution, rinsing thoroughly afterwards so no bleach reaches the drinking tap. A reverse osmosis tank benefits from the same quarterly routine, and the lines downstream of a UV lamp deserve attention too, since the lamp only treats water passing through it.
Never use harsh solvents or abrasive pads inside a housing, since scratches become footholds for biofilm and can damage the sealing surface. Food-grade silicone lubricant on the O-ring keeps it supple and sealing, and a spare O-ring for each housing size in the spares box means a nicked ring never forces a delayed change. The rule is simple: every time a housing is opened, it is cleaned before it is closed.
Watching Pressure, Flow, and TDS Between Changes
The gauges on either side of each filter are the station’s early-warning system. A growing pressure difference across a filter means it is clogging, and a sudden drop in flow at the taps usually means the same thing. Checking the gauges monthly takes seconds and catches a failing cartridge weeks before the taps slow to a trickle.
Total dissolved solids, measured with a handheld TDS meter, is the equivalent check for reverse osmosis. A rising TDS reading at the RO tap means the membrane is ageing or the pre-filters are exhausted, and it is the signal to change filters before water quality falls. A simple log on the station wall, one line a month with the date, the pressure readings, and the TDS number, turns those checks into a trend that shows problems developing rather than arriving.
| Warning sign | Likely cause | Action |
|---|---|---|
| Pressure drop across one filter | Cartridge clogged | Replace that cartridge |
| Flow slow at all taps | Sediment filter exhausted | Replace sediment stage |
| Rising TDS at RO tap | Membrane or pre-filters worn | Change pre-filters, test membrane |
| Chlorine taste returns | Carbon filter exhausted | Replace carbon stage |
| Slimy housings | Biofilm growth | Clean and sanitise housings |
These checks cost almost nothing and catch the failures that matter. A filter that is changed on condition, when the gauges say so, lasts longer than one changed on a rigid calendar, and a system that is monitored never fails silently.
Water Testing: What to Test and When
Testing is what proves the station is working, and it should be part of the routine rather than an afterthought. A comprehensive water test from a certified lab once a year covers bacteria, nitrates, hardness, iron, pH, and total dissolved solids, and it costs far less than the equipment it protects. Well owners should test annually at minimum, since private wells are not covered by municipal testing and the homeowner carries the responsibility alone.
- Test annually with a certified lab for bacteria, nitrates, hardness, iron, and pH.
- Test after changes to the system, such as a new filter stage or a new well pump.
- Test when taste changes or when fixtures start staining, since both signal a stage has failed.
- Keep results on the station wall beside the schedule so trends are visible.
- Match the system to the test, adding or removing stages only when the water profile supports it.
Testing also guides purchases, because a filter should only be bought for a contaminant the test has actually found. A home with soft water does not need a softener, and a home with no iron problem does not need an iron filter, no matter how convincing the sales pitch. The station record, with tests and change dates side by side, is what keeps the system honest.
Safety, Shutoffs, and When to Call a Water Professional
Water work has two risks worth respecting: flooding and contamination. Always shut off the water and release pressure before opening a housing, and always know where the main shutoff is before starting, because a stuck valve or a cracked sump can release a surprising amount of water in seconds. Keep the station’s bypass valve labelled and test it yearly, since a bypass that has seized shut is useless in an emergency.
Call a water treatment professional for work beyond routine cartridge changes: persistent bacterial test failures, arsenic or nitrate problems, a softener that will not regenerate, or any installation involving the main line, a well pump, or backflow prevention. Those jobs need licensed expertise and, in many areas, permits and inspections. Routine maintenance is a homeowner’s job, but water safety is a professional’s responsibility when the tests say so.
Household Filter Maintenance Station FAQs
How often should whole-house filter cartridges be changed?
Sediment cartridges typically last three to six months and carbon cartridges six to twelve months, depending on water quality and household use. Change them when pressure gauges show clogging or the calendar interval arrives, whichever comes first.
Can I put all my filters in one station?
Yes, and that is the point: mount the housings in treatment order on one backboard with valves and gauges for each stage. Keep the reverse osmosis unit under the kitchen sink as a point-of-use stage, and service it from the same schedule.
Do UV lamps need replacing if they still glow?
Yes, UV lamps lose disinfection power after about 9,000 hours of use even though they still produce visible light. Replace the lamp annually and clean the quartz sleeve at the same time.
What causes a sudden drop in water pressure after a filter change?
Usually air trapped in the housing or a cartridge fitted the wrong way up. Bleed the air through the relief button, check the cartridge orientation, and confirm the inlet and outlet valves are fully open.
Is a maintenance station worth it for municipal water?
Yes, even municipal water benefits, since sediment and carbon stages protect appliances and improve taste. The station simply makes the maintenance visible and regular, which is where most systems fail.
Final Thoughts: A Filter Station Turns Maintenance Into a Habit
A dedicated filter maintenance station does not change the water, it changes the behaviour around the water. When every housing is labelled, every spare is in reach, every date is on the wall, and every change takes ten dry minutes instead of an hour of searching and mopping, the maintenance happens on time. Build the station around the treatment chain your water test supports, keep the calendar honest, and the system will quietly deliver clean water for years.

