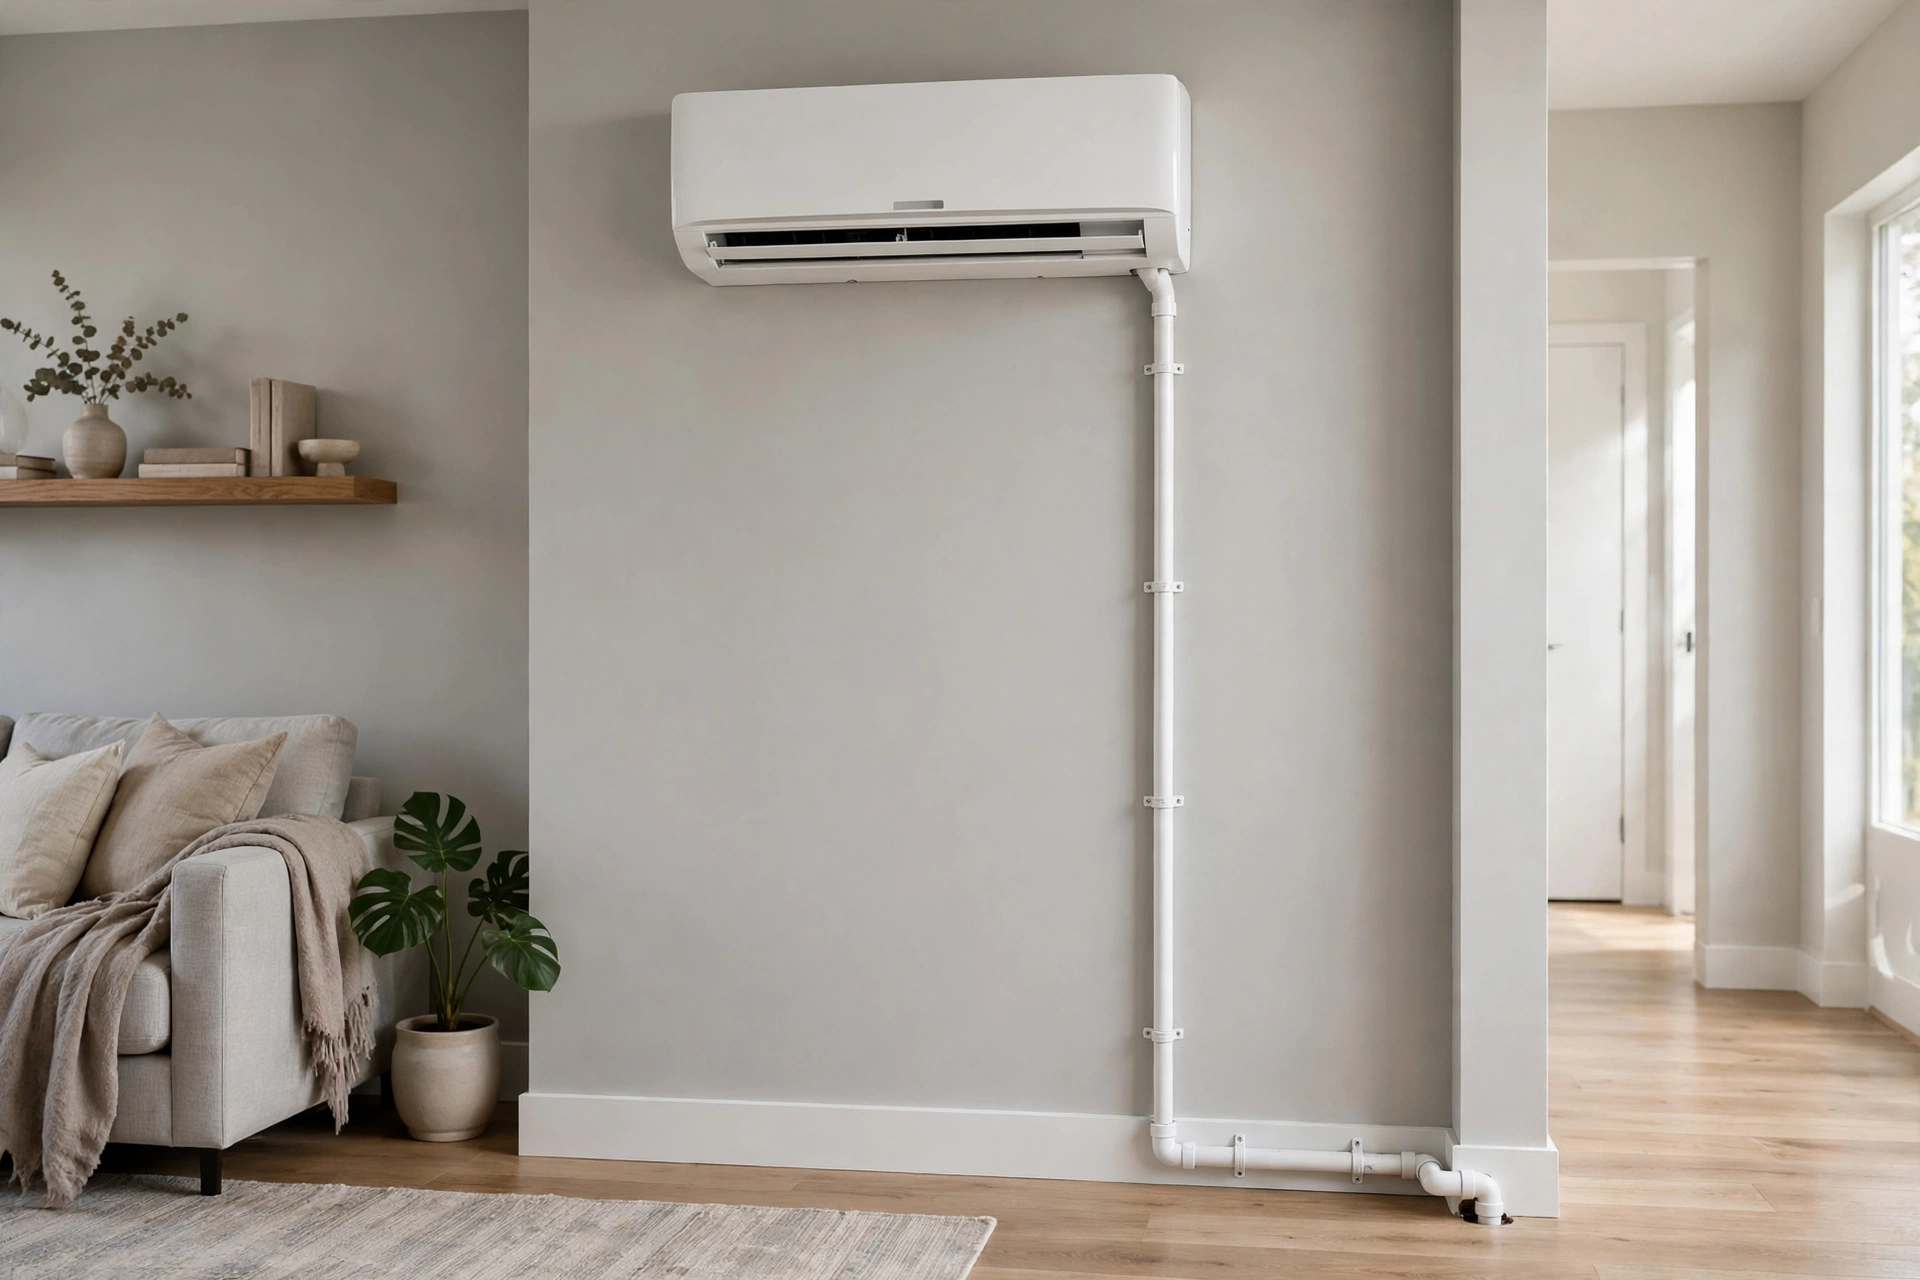
A mini split on an interior wall cools just as well as one on an exterior wall. The difference is not comfort, it is water. In cooling mode, moisture pulled from room air collects in a pan inside the head unit, and that water has to go somewhere. On an exterior wall the answer is simple: a short hose drops straight outside. On an interior wall, with no outside wall nearby, the drain line must cross rooms, ceilings, or floors before it reaches a safe discharge point.
The Short Answer: How a Mini Split Drains When No Outside Wall Is Nearby
When a mini split head sits on an interior wall with limited exterior wall access, the condensate drain is routed in one of two ways. If a continuous downhill path exists to an approved drain point, such as a floor drain, utility sink, or distant exterior wall, the line runs by gravity at a steady downward slope. If no downhill path exists, a small condensate pump lifts the water up and over the obstacle, then releases it into a gravity line. Gravity is always the first choice because it has no moving parts to fail; a pump is the backup that makes interior-wall installations possible, and it must include a safety switch that shuts the unit down if the water level rises too high.
Where the Water Comes From and How Much a Head Actually Makes
Condensate is not a leak and not a defect. Warm room air passes over the cold evaporator coil inside the head unit, and moisture in that air condenses on the coil surface, like droplets on a cold drink on a summer day. The droplets fall into a drain pan and flow out through a drain outlet on one side of the unit. Published guidance suggests a single head can produce roughly five to twenty gallons of condensate per day at peak cooling. A drain failure rarely shows up as a puddle on day one; it usually appears weeks later as a damp patch inside a wall or a stained ceiling.
Mapping the Drain Path Before the Head Goes on the Wall
The most expensive drain mistake is choosing the head location first and discovering the drain route afterward. Before anything is mounted, walk the route the water will take: does it fall continuously, can it be reached for cleaning, and where does the water end up?
- Find the nearest approved discharge points first.
- Measure the run and the available drop: a gravity line needs roughly a quarter inch of fall per foot, so a 20-foot run needs about five inches of drop.
- Note every obstacle the line must cross: studs, joists, ductwork, and wiring.
- Place access panels at every pump, connection, and sharp direction change.
The Gravity-First Rule: Finding a Downhill Route Through the House
Gravity drainage is the default for a reason: it costs nothing to run, makes no noise, and cannot suffer a motor failure or power cut. The rule is unforgiving: the line must slope downward continuously from the unit to the discharge point, with no flat spots, dips, or uphill sections. Manufacturer manuals commonly specify a minimum slope of a quarter inch per foot. A downhill route often exists even when it is not obvious: a head mounted high on an interior wall may drop inside the wall cavity to a basement floor drain. For pipe, the short flexible hose supplied with the unit suits the connection at the head, but long runs should transition to rigid PVC, commonly three-quarter inch, because flexible vinyl tubing sags over time and each sag traps water and debris.
When Uphill Is Unavoidable: Choosing a Condensate Pump That Fits the Room
A condensate pump is a small electric pump with a reservoir and a float switch. Water from the head drains by gravity into the reservoir, and when the level rises to a set point, the float triggers the pump, which pushes the water through a narrow discharge tube to a point where gravity can take over again. The pump must sit lower than the drain pan so water flows into it freely, and it must be sized for the lift height and distance of the pumped section. Two features are non-negotiable: a safety overflow switch, wired into the mini split's control circuit, that stops the indoor unit if the reservoir level climbs too high because the pump failed or the line clogged; and accessibility, because the pump needs periodic cleaning, as warm, standing condensate grows algae and slime inside the reservoir and tubing.
Five Interior Routes Ranked for a Head With No Exterior Wall
The best route is usually the shortest one that keeps falling and stays reachable.
Down inside the wall to a lower floor, then along joists to a floor drain. Every joint must be tested before the wall closes.
Across the ceiling or attic to a distant exterior wall. The line must be supported and insulated in unconditioned space.
Through the floor joists to a basement drain. The joist path must avoid wiring and ductwork.
Along the wall in a decorative line-set cover. The friendliest retrofit: the cover snaps open for service, but must not squeeze the drain line flat.
Pumped to a nearby plumbing fixture, such as a laundry standpipe or utility sink. The most flexible option, and the one that adds a mechanical part to maintain.
Hiding the Line Without Trapping It: Covers, Cavities, and Access
Concealment should be planned around access rather than instead of it. Decorative line-set covers work best on straight wall runs and open with a screwdriver. Routing inside a wall cavity or ceiling gives the cleanest finish but carries the strictest conditions: support the line so it cannot sag, test every joint before the drywall closes, and place access panels at the pump and at every connection. One rule applies to every concealed route: never bury a flexible vinyl hose inside a wall for a long run, because vinyl relaxes and sags, and a sag inside a closed wall is invisible until the damage is visible. Transition to rigid PVC as soon as the line leaves the head.
Where the Drain Should End — and the Terminations to Rule Out
Condensate is essentially clean water, but it is not drinking water, and where it ends up is regulated in many areas. Acceptable discharge points generally include a floor drain, a utility sink or laundry standpipe, or a landscaped area well away from the foundation. When connecting to any plumbing fixture, the drain must end with an air gap, commonly about two inches between the end of the line and the receiving drain, so a sewer backup can never siphon back into the unit. Never terminate a drain on a walkway, driveway, or patio, where water creates a slip hazard and, in cold weather, ice; never run it into a wall cavity with no drainage; and never connect it directly to a sewer line without an air gap or approved trap arrangement.
The First-Run Test: Proving the Drain Works Before the Walls Close
A drain line should be proven, not assumed: test it once before any wall or ceiling is closed up, and again at system startup. Pour water slowly into the drain pan, or into the pump reservoir where one is fitted, and watch the full route. Water should move promptly, without gurgling or backing up, and every joint should stay dry. For a pumped system, confirm the pump starts at its set level, stops when the reservoir empties, and that the safety switch shuts the unit down when the float is lifted manually. Also confirm the head unit itself is level, because a tilted head can send water to the wrong side of the pan, and confirm the discharge point is not submerged.
Keeping a Hidden Drain Clear Season After Season
A drain line in an interior route needs a maintenance habit, because the same warm, dark, wet conditions that make condensate also grow the algae and biofilm that clog lines. The basic routine is a seasonal flush: pour a cup of white vinegar or a manufacturer-approved cleaning solution into the drain pan or pump reservoir, then flush with clean water. Clean or replace the air filters on schedule as well, since a dirty filter can cause the coil to ice up and send a surge of meltwater into the pan. For pumped systems, add reservoir cleaning: switch the pump off and wipe away slime. Watch for early warnings between services: musty odors near the head, water stains below it, or unexpected shutoffs.
Routing Errors That Flood Interiors Long After Installation Day
Most interior drain failures trace back to a handful of avoidable errors. The first is a sagging line, usually flexible hose run too far without supports, which creates a trap that fills with sediment and slime until flow stops. The second is a line run dead level through a wall, which leaves standing water along its whole length. The third is a discharge line ending too close to the foundation, in a walkway, or inside a wall cavity. Other errors are subtler: a pump installed above the drain pan cannot fill by gravity and will run dry; a discharge tube with unnecessary length and extra lift forces the pump beyond its rating; and no access panel turns a quick cleaning into a drywall repair.
When a Drain Route Belongs in a Licensed Installer's Hands
Routing a drain line is not always a do-it-yourself job. Any route that requires opening finished walls, drilling through structural members, tying into household plumbing, or working on the refrigerant circuit belongs with a licensed HVAC installer, and in many jurisdictions a new mini split installation requires a mechanical permit and inspection. Electrical work for a condensate pump should likewise be handled or verified by a qualified electrician. Call a professional promptly if you see water around a head unit, if the unit shuts off repeatedly, or if a drain line runs where you cannot inspect it. Costs vary widely by region and route complexity; the figures below are estimates only, not quotes.
Mini Split Condensate Drain Routing Questions, Answered
Can a mini split drain into a sink or a laundry standpipe?
Yes, in many installations, provided the connection ends with an air gap above the fixture and local code allows it. The line should terminate above the sink or standpipe, not be hard-piped in.
Does a mini split on an interior wall always need a condensate pump?
No. A pump is only required when no continuous downhill route exists to an approved discharge point. If the head can drain down through a wall cavity, a chase, or floor joists to a lower drain, gravity alone is enough.
How far can a condensate pump push water?
It depends on the pump model. Each model publishes a maximum lift height and a maximum horizontal run, and exceeding either rating shortens pump life and risks overflow. Choose against the actual measured lift and distance of your route.
Why does my mini split keep shutting off on hot days?
One common cause is the condensate safety switch. If the drain is clogged, the pump has failed, or the discharge line is blocked, water backs up, the float rises, and the switch stops the unit to prevent overflow.
Can the drain line share a cover with the refrigerant lines?
Yes, line-set covers are designed to carry the refrigerant tubing, the drain line, and the control cable together. Keep the drain line supported inside the cover so it holds its slope.
What happens to the drain line in winter?
If the system heats in winter, condensate production drops, but exterior sections of drain line can still hold water that freezes and blocks the line. Insulate drain sections in unconditioned space.
How often should a hidden condensate drain be cleaned?
At least once a cooling season, and twice a year for pumped systems or humid climates. A vinegar flush through the pan or reservoir prevents the biofilm buildup that causes most clogs.
Final Call: Picking the Drain Route Your Room Can Live With
A mini split on an interior wall is not a compromise, provided its drain is treated as part of the installation rather than an afterthought. Start with gravity, use a pump only where the house forces you to, keep every run sloped, supported, and reachable, and end the line somewhere water can go without harming the house. Test the whole route before the walls close, and give it a seasonal flush from then on.

