Insulation is one of the few home improvements that pays you back every month, but only if you match the material to your climate and to the place you are putting it. A product that works brilliantly in a Minnesota attic can trap moisture in a Florida wall, and the cheapest batt on the shelf can end up costing the most if it sags, gets damp, or leaves gaps for air to slip through. This guide compares the main options side by side — what each one does well, where it struggles, and what it realistically costs — so you can choose with confidence instead of guessing at the hardware store.
Insulation Basics and R-Values Explained Simply
Insulation slows heat movement. In winter it keeps warmth inside, and in summer it keeps heat out. Its strength is measured as R-value: the higher the number, the stronger the resistance to heat flow. What confuses many owners is that R-value is quoted two ways, per inch and for the whole product. A thick fiberglass batt might be R-19 in total, while one inch of closed-cell spray foam is about R-6.5 on its own.
R-value alone is not the whole story. Air leaks can cut real performance by a third or more, which is why sealing gaps around pipes, wires, and top plates matters as much as the insulation itself. Moisture is the third factor. Wet insulation loses performance and can feed mold, so vapor control and ventilation must suit your climate.
- Attics usually need the highest R-value in the house, often R-38 to R-60 in cold areas.
- Walls are limited by stud depth, so R-value per inch matters more there.
- Floors over garages or crawl spaces need insulation plus an air barrier to feel warm.
- Always air-seal first — insulation over a leak is money wasted.
Fiberglass Options: Affordable and Widely Available
Fiberglass is still the most common insulation in North American homes, and for good reason. It is inexpensive, widely stocked, and familiar to almost every contractor. You will find it as batts and rolls for standard stud bays, and as loose-fill that is blown into attics.
Batts, Rolls, and Loose-Fill
Pre-cut batts typically provide R-13 to R-15 in a 2×4 wall and R-19 to R-21 in a 2×6 wall, at roughly $0.65 to $1.20 per square foot for materials. Loose-fill fiberglass in an attic costs about $1.00 to $1.80 per square foot installed and settles less than older products. The weakness is fitting. Batts must fill the cavity fully without being stuffed or compressed. Gaps around electrical boxes and split batts behind pipes are where fiberglass jobs fail.
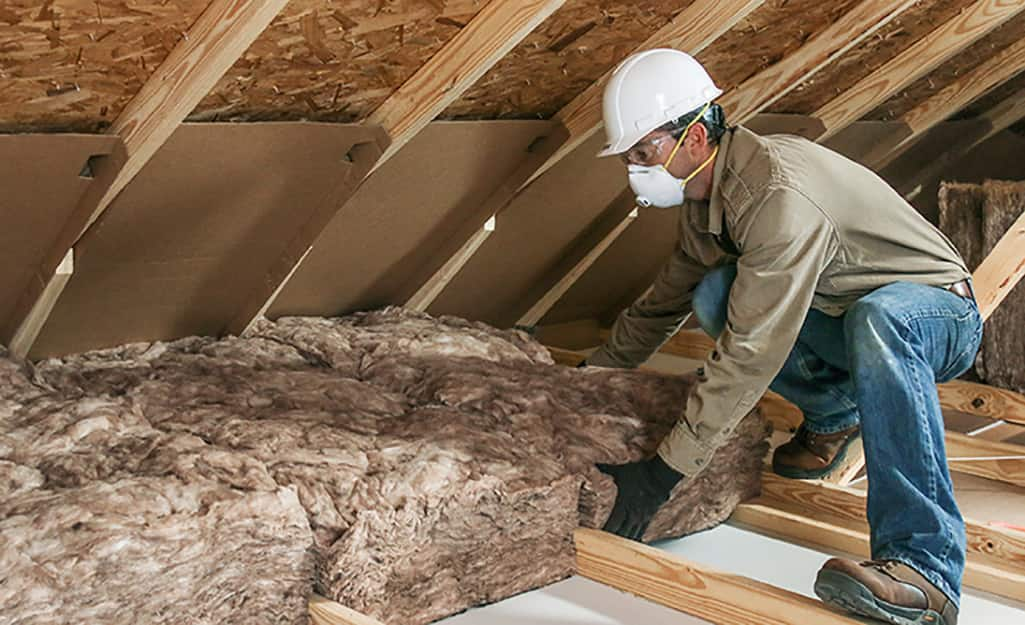
Fiberglass does not stop air on its own, does not like getting wet, and can irritate skin and lungs during installation, so gloves, sleeves, and a proper mask are essential. For a dry, accessible attic or a new wall you can fit carefully, it remains hard to beat on price.
Spray Foam Comparison: Open-Cell vs Closed-Cell
Spray foam is both insulation and an air seal in one application, which is why it performs so well in leaky older homes, rim joists, and awkward spaces. The choice is between open-cell and closed-cell, and they behave quite differently.
Open-Cell Foam
Open-cell foam is soft and spongy, at about R-3.6 to R-3.8 per inch. It expands a lot, seals cracks well, and dampens sound. Installed cost is typically $0.45 to $1.00 per board foot. Because it can absorb water, it is best inside walls and roof decks in drier assemblies, not below grade.
Closed-Cell Foam
Closed-cell foam is dense and rigid, at R-6.0 to R-7.0 per inch, and it resists water and adds structural strength. It costs more, usually $1.10 to $2.00 per board foot installed. Two inches can act as its own vapor retarder, which helps in cold climates and flood-prone areas. The downsides are price, the need for professional installation, and the fact that mistakes are hard and expensive to remove. For most homes, foam is best used selectively — rim joists, crawl space walls, and cathedral ceilings — rather than everywhere.
Cellulose and Mineral Wool: Two Strong Alternatives
If fiberglass feels too basic and foam feels too expensive, cellulose and mineral wool sit in the sensible middle. Both have loyal followings, but for different reasons.
Cellulose Insulation
Cellulose is made mostly from recycled newspaper treated with borates for fire and pest resistance. Blown into attics it gives about R-3.2 to R-3.8 per inch, and dense-packed into walls it also slows air movement noticeably. Installed attic cost is often $1.20 to $2.20 per square foot. It fills odd shapes better than batts and is a good choice for topping up an existing attic. It can settle over time, so installers should add extra depth, and it must stay dry because it holds moisture longer than fiberglass.
Mineral Wool Insulation
Mineral wool, often sold as rock wool, is spun from stone or slag. Batts give about R-4.0 to R-4.3 per inch, resist fire up to very high temperatures, repel water, and block sound exceptionally well. Expect $1.20 to $2.20 per square foot for materials, more than fiberglass. It cuts cleanly, fits friction-tight, and does not sag. For bathrooms, home theaters, party walls, and homes in wildfire-prone areas, many owners find the premium worthwhile.
Rigid Foam Boards for Continuous Insulation
Rigid boards are used where you need insulation in a thin, continuous layer without studs interrupting it. The three common types are expanded polystyrene (EPS) at about R-3.6 to R-4.0 per inch, extruded polystyrene (XPS) at about R-5.0 per inch, and polyisocyanurate (polyiso) at R-6.0 to R-6.5 per inch, though polyiso loses some performance in very cold weather.
Boards shine on basement walls, under slabs, on exterior walls under new siding, and on low-slope roofs. Costs range from about $0.90 to $2.50 per square foot depending on type and thickness, plus labor. A practical example: adding one inch of XPS over an exterior wall during a re-siding job can lift the whole wall’s performance because it covers the studs, which are thermal bridges. Boards must be detailed carefully — taped seams, correct flashing, and protection from sunlight and solvents — and local code may require a fire-protective covering indoors.
Radiant Barriers and Reflective Insulation
Radiant barriers are shiny foil materials, usually installed on the underside of a roof or across attic rafters. They do not work like bulk insulation. Instead of resisting conducted heat, they reflect radiant heat from a sun-baked roof, which can lower attic temperatures by 5 to 10 degrees on hot afternoons and reduce cooling load.
They make sense mainly in hot, sunny climates — think Texas, Arizona, and the Gulf Coast — especially with ductwork in the attic. Material cost is low, roughly $0.15 to $0.50 per square foot, plus installation. In cold or cloudy climates the benefit is small, dust reduces reflectivity over time, and a radiant barrier never replaces the R-value your attic still needs. Treat it as a helpful extra in the right climate, not a substitute.
Choosing by Climate Zone: What to Prioritize Where
The U.S. is divided into eight climate zones, and your zone should drive both how much insulation you install and which risks you design for. Use the patterns below as a starting point, then check your local code for exact targets.
- Cold and very cold (Zones 5–8): Prioritize a deep attic, R-49 to R-60, air sealing, and careful vapor control. Closed-cell foam at rim joists and mineral wool or dense cellulose in walls work well.
- Mixed (Zone 4): Aim for R-38 to R-49 in the attic and R-13 to R-21 in walls. Most materials work; focus on air sealing and keeping ducts inside the insulated space.
- Hot-humid (Zones 1–3, moist): Prioritize cooling load, moisture control, and sealed ducts. Avoid interior vapor barriers that trap humidity. Light-colored roofing plus a radiant barrier can help.
- Hot-dry (Zones 2–3, dry): High attic R-value still matters because nights cool down. Radiant barriers perform well here, and rigid foam on exterior walls cuts afternoon heat gain.
- Marine (Zone 4C / coastal): Manage wind-driven rain and drying. Mineral wool and rigid foam handle damp conditions better than standard batts.
A concrete example helps. A homeowner in Chicago (Zone 5) gets the biggest return from blowing cellulose to R-56 in the attic and foaming the rim joists. The same budget in Houston (Zone 2) is better spent sealing the attic, insulating ducts, and adding a radiant barrier. Same house size, opposite priorities — climate decides.
Final Thoughts
There is rarely one best insulation for an entire house. The smartest projects mix materials by location: affordable blown insulation for depth in the attic, foam only where air sealing is critical, mineral wool where fire or sound matters, and rigid board where a continuous layer is needed. Start with an air-sealing pass, target the attic first, and match vapor and moisture choices to your climate zone. Done in that order, even a modest budget will lower bills, even out room temperatures, and make the house noticeably quieter and more comfortable year-round.
Frequently Asked Questions
Which insulation gives the best value for money?
For most attics, blown cellulose or fiberglass gives the lowest cost per R-value. For walls you can fit carefully yourself, fiberglass batts are cheapest. Spend more per inch only where space is tight or air sealing is the main problem.
Should I insulate the attic or the walls first?
Start with the attic. Heat rises, attic work is usually easiest and cheapest, and it delivers the fastest comfort and bill savings. Move to rim joists, floors, and walls afterward, unless a remodel has the walls already open.
Is spray foam safe and worth the higher cost?
Properly installed and cured spray foam is considered safe, but occupants should stay out during application and for the re-entry time the installer specifies, often 24 hours. It is worth the cost in leaky, hard-to-seal spots, not as a blanket choice for every cavity.
Can I add new insulation over old insulation?
Usually yes, if the old material is dry, not moldy, and not badly compressed. Do not add a second vapor barrier, and never cover knob-and-tube wiring or recessed lights without checking clearances and local code first.
When should I hire a professional instead of doing it myself?
Hire a professional for spray foam, dense-pack cellulose, work near wiring or flues, and any job involving mold, asbestos risk, or major air-sealing. Batts in an open attic floor and simple rigid board projects are the most realistic do-it-yourself options.

