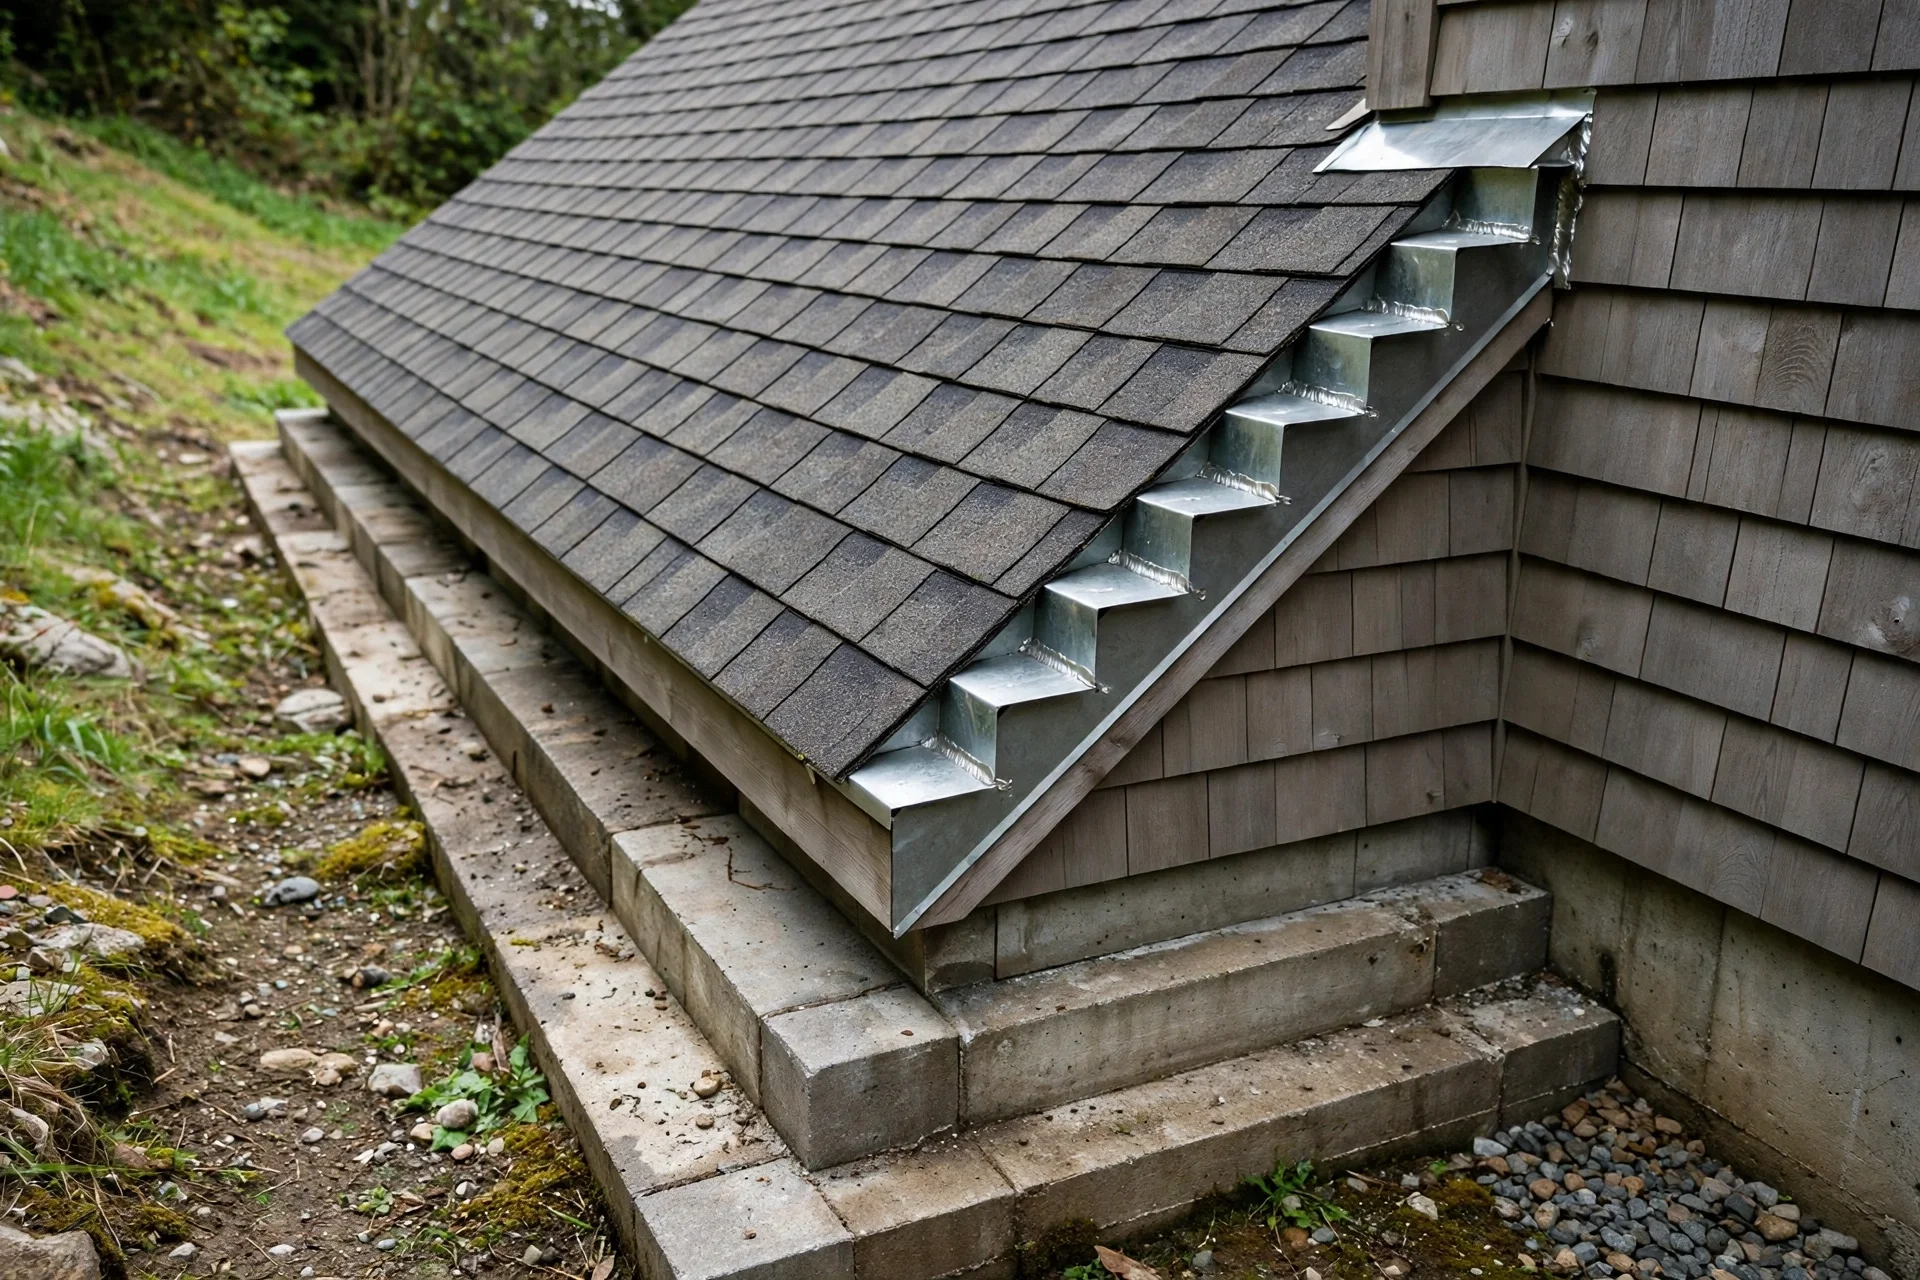
A multi-level home rarely has a level foundation. Where the ground slopes, or where one part of the house sits lower than another, the concrete foundation steps down in a series of ledges — and every step is a place where water can get in. The brick or stone veneer above must be flashed along the base of the wall directly on top of each step, and if that flashing is missing, torn, or lapped the wrong way, rainwater runs down the wall, finds the inner corner of the step, and enters the building. The damage is slow and hidden: damp sheathing, rotted framing, and mould behind a veneer that looks perfectly sound. The short answer is that a stepped foundation needs a flashing system, not a single flashing — a continuous, stepped, lapped sequence that follows every change of level and discharges water outward at every step.
This guide explains how modern foundation step flashing systems work on multi-level homes: the materials that last, the inner-corner detail that decides whether the system holds, the weep and ventilation rules that keep the cavity dry, and the retrofit options when the original flashing has failed. The steps in a foundation are not a defect — they are a detail that must be flashed as carefully as a roof.
Why Multi-Level Foundations Leak at the Steps
The risk grows with the number of steps. A single-level home has one base flashing line to get right; a multi-level home has several, at different heights, on different elevations, each one depending on the one above it. A failure at the highest step does not stay at the highest step — the water it admits runs down inside the wall and appears as dampness at the lowest level, far from its source. That is why step flashing must be treated as one connected system, installed from the top step down, with every level lapped to shed water onto the level below it.
How Step Flashing Turns a Stepped Foundation Into a Drained One
The sequence matters as much as the material. The lower flashing is installed first, flush on the concrete and carried up the vertical face of the step. Then a prefabricated flashing end dam is set tightly against the inner corner of the foundation, sealing the point where the horizontal and vertical surfaces meet. The upper flashing is then installed continuously around the stepped foundation, extended and cut to match the length of the vertical surface of the concrete step. Each layer laps over the one below it, shingle-fashion, so water always stays on the outside of the barrier and is always moving down and out.
The Inner Corner: The One Detail That Decides Everything
Ask any masonry specialist where a stepped foundation fails and the answer is the same: the inner corner. The brick veneer is most vulnerable to water penetration through the inner corner of the stepped concrete, because that is where two planes meet, where the flashing must change direction, and where a cut or a fold is hardest to make watertight. Any break in the flashing at that corner — a tear, a gap, a poorly sealed joint — becomes a direct path for water into the building, and the veneer hides it completely.
- Seat the flashing flat — no bridging or tenting across the corner, or water will pool beneath it.
- Fit the end dam tight — it must sit hard against the inner corner with no gap behind it.
- Run the vertical leg up — at least six inches beneath the building wrap, never short of it.
- Tape every cut — all cuts and tears in the building wrap must be sealed so the wrap stays impervious.
- Drip past the face — extend the flashing at least half an inch beyond the foundation to clear the wall.
The inner corner should be photographed before the veneer closes it. Once the brickwork goes up, the corner cannot be inspected without removing the veneer, so the photograph is the only proof the detail was built correctly. A builder who photographs each corner as it is flashed is a builder who expects the detail to be checked — and that expectation is worth more than any warranty clause.
Flashing Materials Compared
Self-adhering rubberised asphalt flashing is the preferred material for stepped foundations, because it bonds to the concrete, seals around fasteners, and flexes with the small movements of the structure. It must be installed on a clean, dry, primed surface, and it must be rolled firmly into place so no air is trapped beneath it. Where rubberised asphalt is not used, PVC flashing of at least 20 mil thickness is acceptable, set in a heavy bed of mastic so it stays in full contact with the concrete and cannot lift or channel water beneath it.
Metal flashings have their place, particularly stainless steel for the drip edge and galvanised steel for exposed conditions, but the base flashing on a stepped foundation is usually a membrane rather than a sheet, because a membrane follows the step without seams. Whatever the material, the same rules apply: it must be corrosion-resistant where it is exposed, it must be UV-resistant if sunlight reaches it, and it must be compatible with the building wrap and the mortar it touches. A flashing that reacts with its neighbours fails early, however well it was installed.
| Flashing material | Where it works best | Installation note |
|---|---|---|
| Self-adhering rubberised asphalt | Base flashing on stepped concrete | Preferred; needs clean, dry, primed surface |
| PVC, 20 mil or thicker | Alternative base flashing | Set in a heavy bed of mastic |
| Stainless-steel drip edge | Exposed edge of the base flashing | Holds the drip line clear of the wall |
| Galvanised steel, 26 gauge | Exposed flashing and kick-outs | At least 0.019 in thick; corrosion-resistant |
The Base Course, the Drip Edge, and the Six-Inch Rule
The base course of veneer sits directly above the flashing, and its detailing decides whether the system can drain. Weep holes in the bottom masonry course, spaced no more than two feet apart, let water that reaches the flashing escape to the outside; without them, the flashing collects water with nowhere to send it. The veneer must also sit above the final exterior grade unless through-wall flashing is provided at grade, because a veneer buried in soil wicks ground moisture upward regardless of how well the step above it is flashed.
The six-inch rule governs the vertical leg: the flashing must extend at least six inches up the sheathing beneath the building wrap. That height is what keeps wind-driven rain, splashback, and snowmelt from overtopping the flashing and reaching the sheathing behind it. Where no brick ledge is formed in the foundation wall, the same six-inch upstand applies to the corrosion-resistant metal or water-resistant flashing that covers the top of the foundation. A shorter upstand is a gamble that the weather will never push water that high — and the weather always wins that bet eventually.
Weeps, Vents, and the Air Gap Behind the Veneer
A stepped foundation wall is a cavity wall, and the cavity needs three things: a minimum one-inch air space between the veneer and the sheathing, weep holes at the bottom, and ventilation openings at the top. The air space breaks capillary action so water cannot wick across to the structure; the weeps drain the water the flashing collects; the vents let the cavity dry. Corbelling the veneer over the foundation is permitted, but only by up to one inch, because a deeper corbel closes the air space and traps water where it should flow.
- One-inch air space — keep the cavity clear between veneer and sheathing.
- Weeps every two feet — open joints directly above each flashing line.
- Ventilation at the top — the cavity must breathe as well as drain.
- Corbel no more than one inch — deeper corbelling closes the air space.
- Keep weeps clear — mortar droppings and landscaping are the usual blockages.
The air gap also protects against a subtler failure: a veneer that touches the sheathing bridges the cavity and gives water a direct path across it. Insulation squeezed into the gap, mortar fins left from laying, and ties installed at the wrong angle all do the same damage. The cavity is a designed space, not leftover room, and it must be kept clear from the first course to the last.
Grade, Gutters, and the Water That Should Never Reach the Step
The best step flashing in the world cannot cope with water that should never have arrived. Final grade must slope away from the foundation, gutters must discharge at least five feet from the foundation wall or into an approved drainage system, and downspouts must never empty against the wall above a step. A downspout that pours roof water onto the ledge of a stepped foundation overwhelms the flashing in a single storm and drives water into the inner corner at exactly the point where the system is most vulnerable.
Landscaping deserves the same attention. Soil, mulch, and paving that creep up against the veneer bury the weep holes, hold moisture against the wall, and hide the base flashing from inspection. Keep the ground at least six inches below the first weep line, keep planting away from the wall face, and make sure the grade still falls away from the house after a season of settling. The flashing system manages the water that reaches the wall; the grade and the gutters decide how much water that is.
Retrofitting Step Flashing on an Existing Stepped Foundation
Retrofitting step flashing is a bigger job than building it in, because the veneer above the step must be removed to reach the flashing line. The usual retrofit takes down the bottom courses of veneer at each step, inspects the sheathing and framing for rot, installs the new flashing sequence with end dams at every inner corner, restores the weeps and the air gap, and rebuilds the veneer. It is disruptive and it is not cheap — which is why the diagnosis must be certain before the first brick comes down.
Before committing to a full retrofit, check the simpler causes. A blocked gutter, a downspout discharging against the step, grade that has risen against the wall, or weeps filled with mortar can each mimic a flashing failure, and each is far cheaper to fix. Moisture readings taken inside and outside, an infrared scan on a cold morning, and a careful look at the drainage above the step will usually show whether the problem is the flashing or the water management around it. Fix the water first; rebuild the flashing only when the flashing is the problem.
When a Masonry or Waterproofing Specialist Should Take Over
Call a masonry or waterproofing specialist when dampness keeps returning at the base of a multi-level wall, when the veneer must come down to inspect the flashing, or when a new stepped foundation is being designed on a sloping site. The specialist brings the flashing details for the specific veneer system, the end dams and drip edges the job needs, and the experience to sequence the work so each step is flashed before the next course of veneer closes it. That sequencing is the part a general contractor most often gets wrong.
Before the specialist arrives, gather the evidence: photographs of the damp areas, the dates they appeared, the direction the wall faces, and any drawings that show the foundation steps. A specialist who can see the pattern will diagnose faster than one who starts from a single stain. Ask for the repair scope in writing, with each step, each end dam, and each weep line listed, so the work can be checked course by course as the veneer goes back up.
Foundation Step Flashing FAQs: Materials, Details, and Multi-Level Homes
What is the most vulnerable point in a stepped foundation?
The inner corner where the horizontal step meets the vertical rise. Water collects there, the flashing must change direction there, and any break in the flashing at that point is a direct path into the building. A prefabricated end dam set tightly against the corner is the detail that protects it.
Which flashing material is best for stepped foundations?
Self-adhering rubberised asphalt is the preferred material, because it bonds to the concrete and flexes with small movements. PVC of at least 20 mil thickness, set in a heavy bed of mastic, is an acceptable alternative. A stainless-steel drip edge at the exposed end holds the drip line clear of the wall.
How far should step flashing extend up the wall?
At least six inches up the sheathing, beneath the building wrap. That height keeps wind-driven rain and splashback from overtopping the flashing. The horizontal leg should extend at least half an inch beyond the foundation face so water drips clear of the wall.
How far apart should weep holes be above step flashing?
No more than two feet apart in the bottom masonry course immediately above the flashing. Wider spacing risks water ponding on the flashing between weeps, and weeps filled with mortar during construction must be cleared before the wall is accepted.
Can step flashing be retrofitted without removing the veneer?
Not properly. The flashing sits beneath the veneer at the base of the wall, so the bottom courses must come down to reach it. Targeted repairs to gutters, grade, and weeps should be tried first, because they often solve what looks like a flashing failure without opening the wall.
Final Thoughts: Dry Steps, Dry Basement, Dry House
A stepped foundation is not a problem to be solved once; it is a system to be built once and checked every year. The flashing sequence, the end dams at every inner corner, the six-inch upstand, the weeps every two feet, and the grade that carries water away — each part is small, each part is cheap, and together they are the difference between a multi-level home that stays dry for decades and one that rots quietly behind a beautiful veneer.
If your home steps down a slope, walk the base of the walls this season. Look for the weeps, check the grade, and ask whether the flashing at each step was ever photographed. The steps will still be there in twenty years; the question is whether the wall above them will be dry, and that answer is written in the flashing nobody sees.

